As I became more involved in paddling, my “fleet” of boats quickly outgrew the room I had in the garage to store them. I needed a rack, but I wanted something simple, inexpensive and protective. A pair of sawhorse brackets that I found at a yard sale inspired me to build the rack you see below.
The rack has survived several New Hampshire winters now, with the only maintenance being a new cover every few years, when the sun takes it toll.
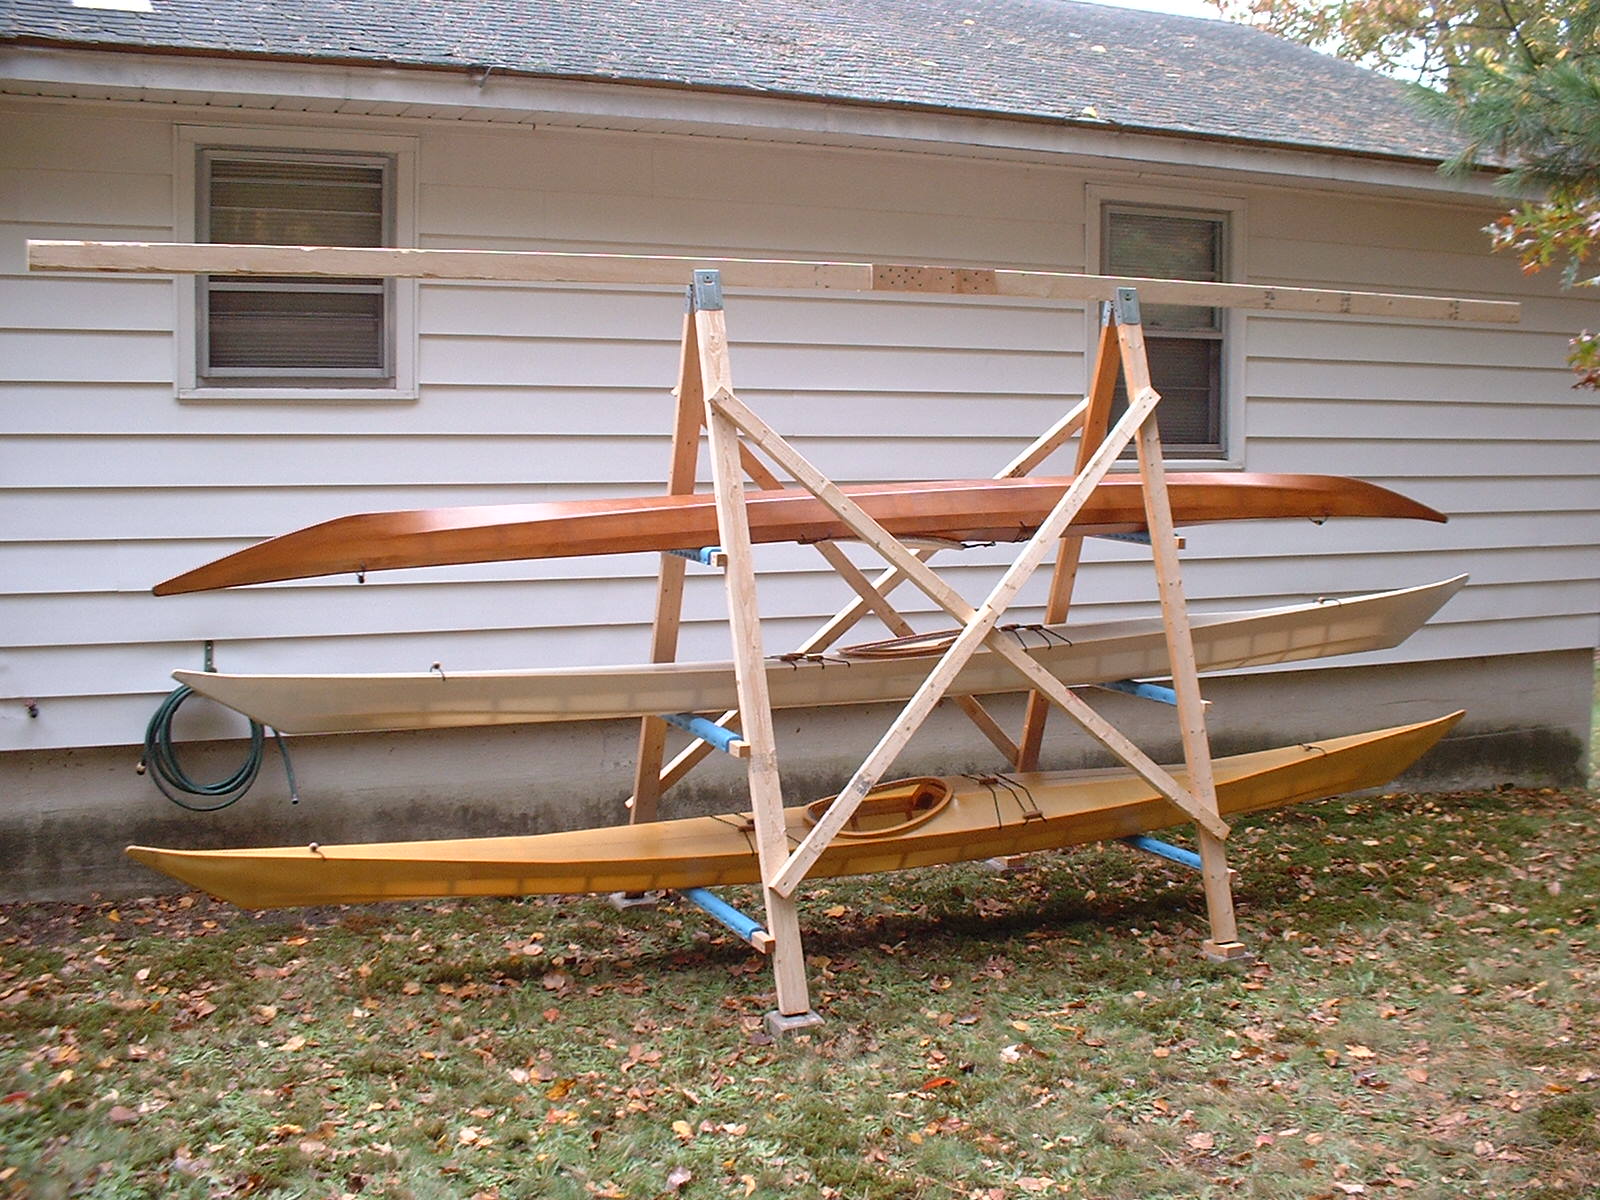
This is a simple rack designed to accommodate a cover over the boats, if desired. I intend to cover it with a tarp that will be staked to the ground at the ends. Empty, it’s light enough for one person to lift and move, but it’s strong enough to climb on. As shown, it can accommodate up to six kayaks, depending on their beam width.
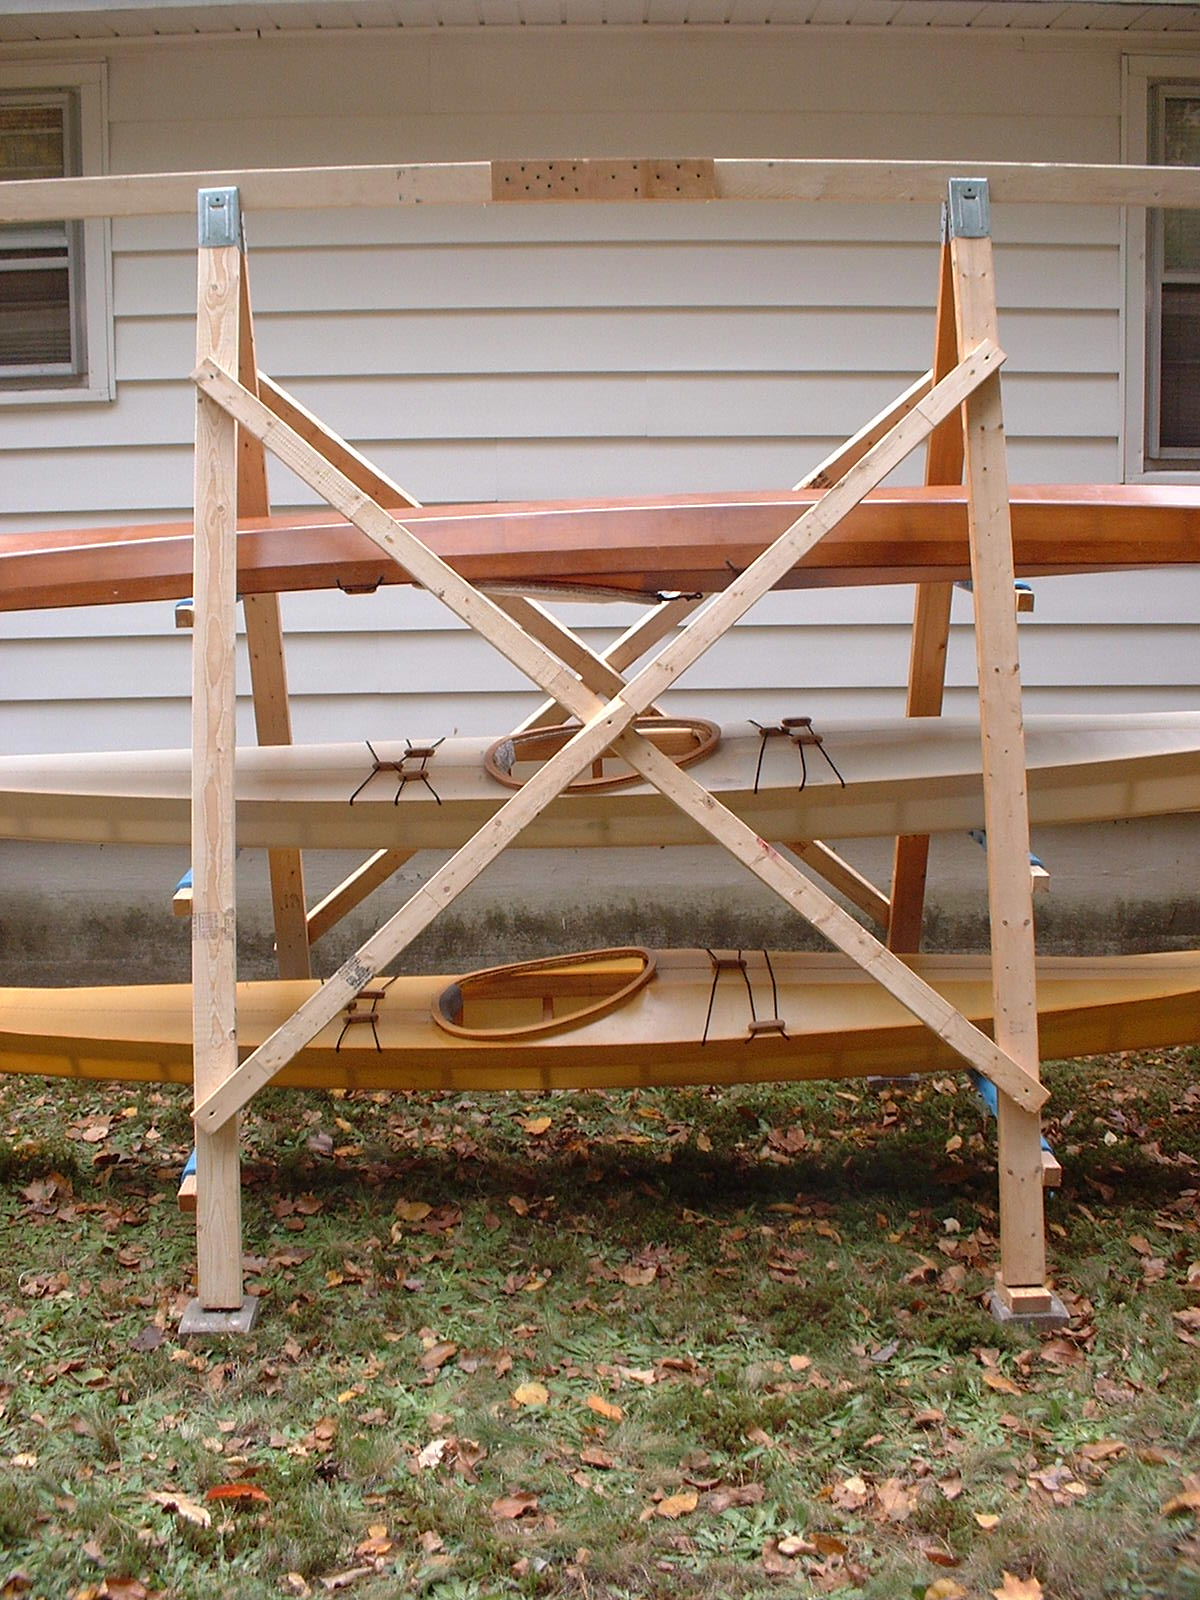
The main supports are built using a pair of sawhorse brackets and 5, 8′ 2×4’s (or 4, 8′ and 2, 10′, if you want a top rail long enough to accommodate a cover for 17’+ boats). The cross braces are 8′ 2×3’s (because I had them on hand), but 1×3 wood strapping could be substituted with no loss in strength. The rack was assembled with drywall screws, so it can be taken apart for modification or repair if necessary. Note: The apparent curvature of the top rail is due to distortion from the wide angle lens; the rail is straight.
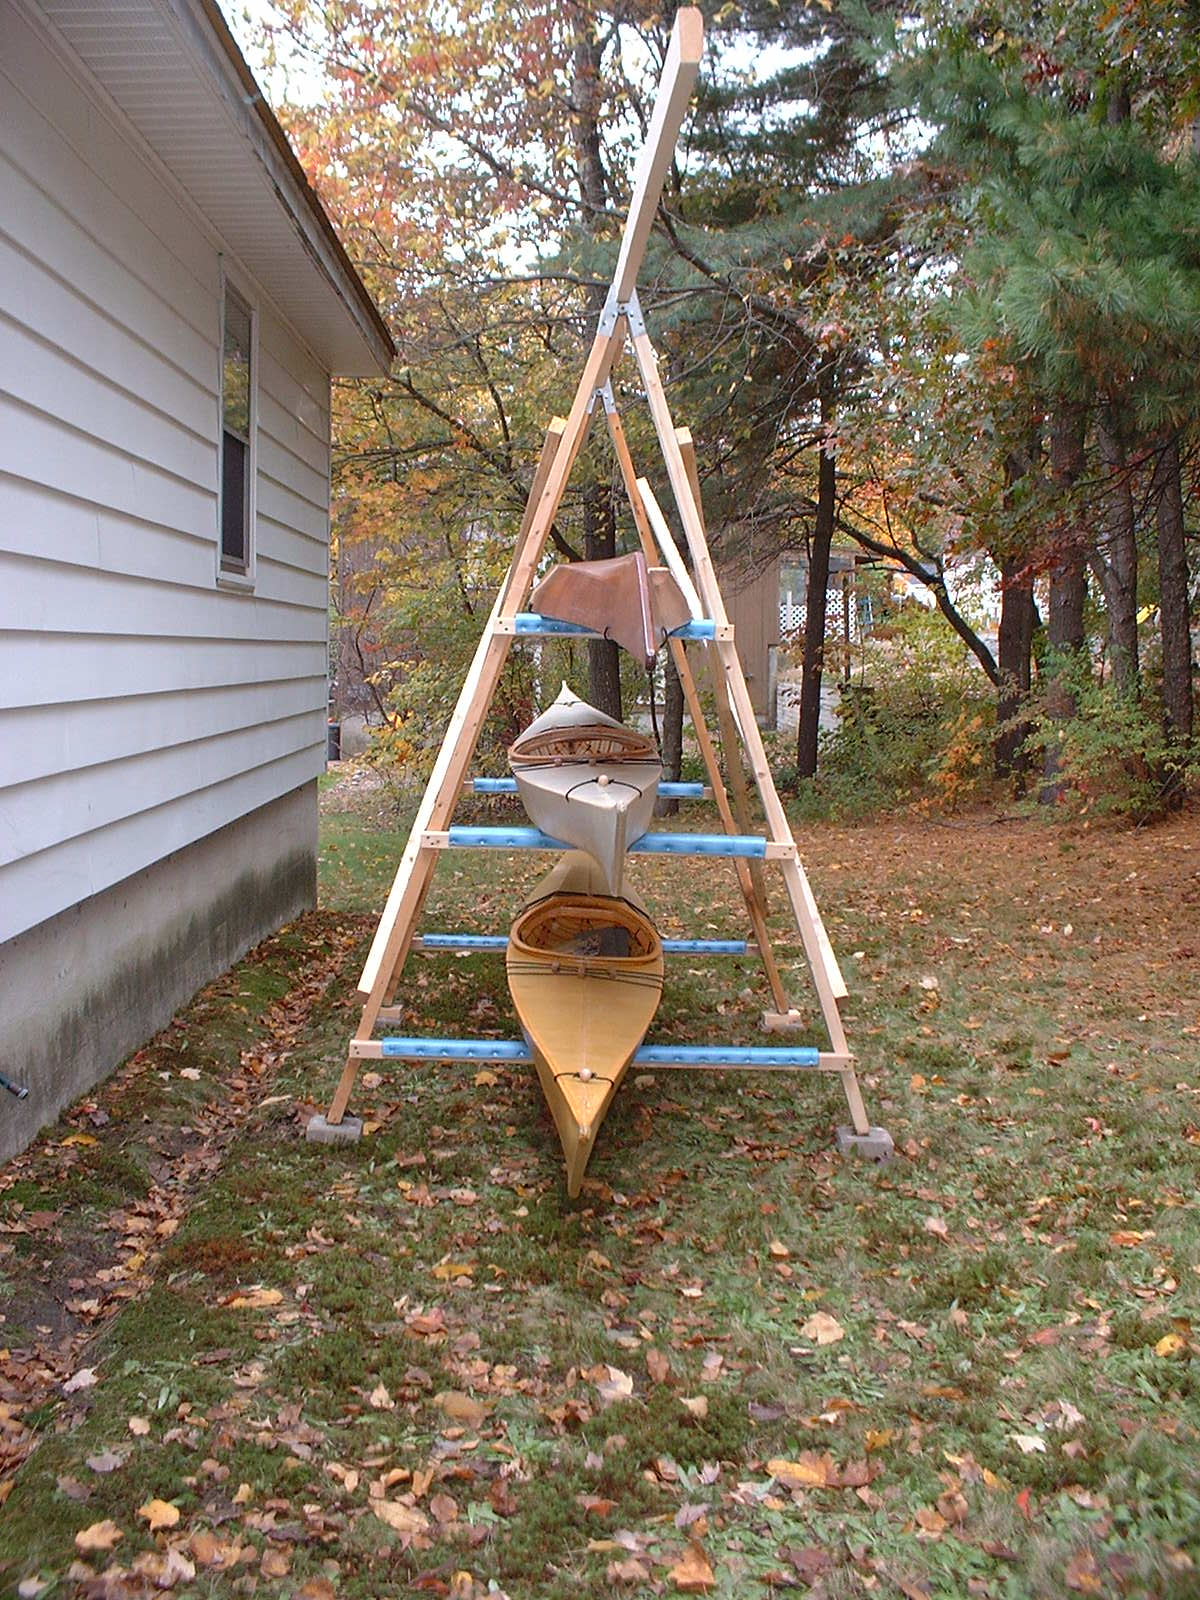
The 3, 2×2 cross members are spaced 22″ apart. The top holds 1 boat, the center holds 1 boat flat or 2 on edge and the bottom holds 2 boats flat or 3 on edge, for a total capacity of 4-6 boats. It would be a simple matter to make a shorter rack with only two supports if this much capacity isn’t required. The rails are padded with closed-cell foam cut from an inexpensive camping pad. Carpet scraps would also work well.
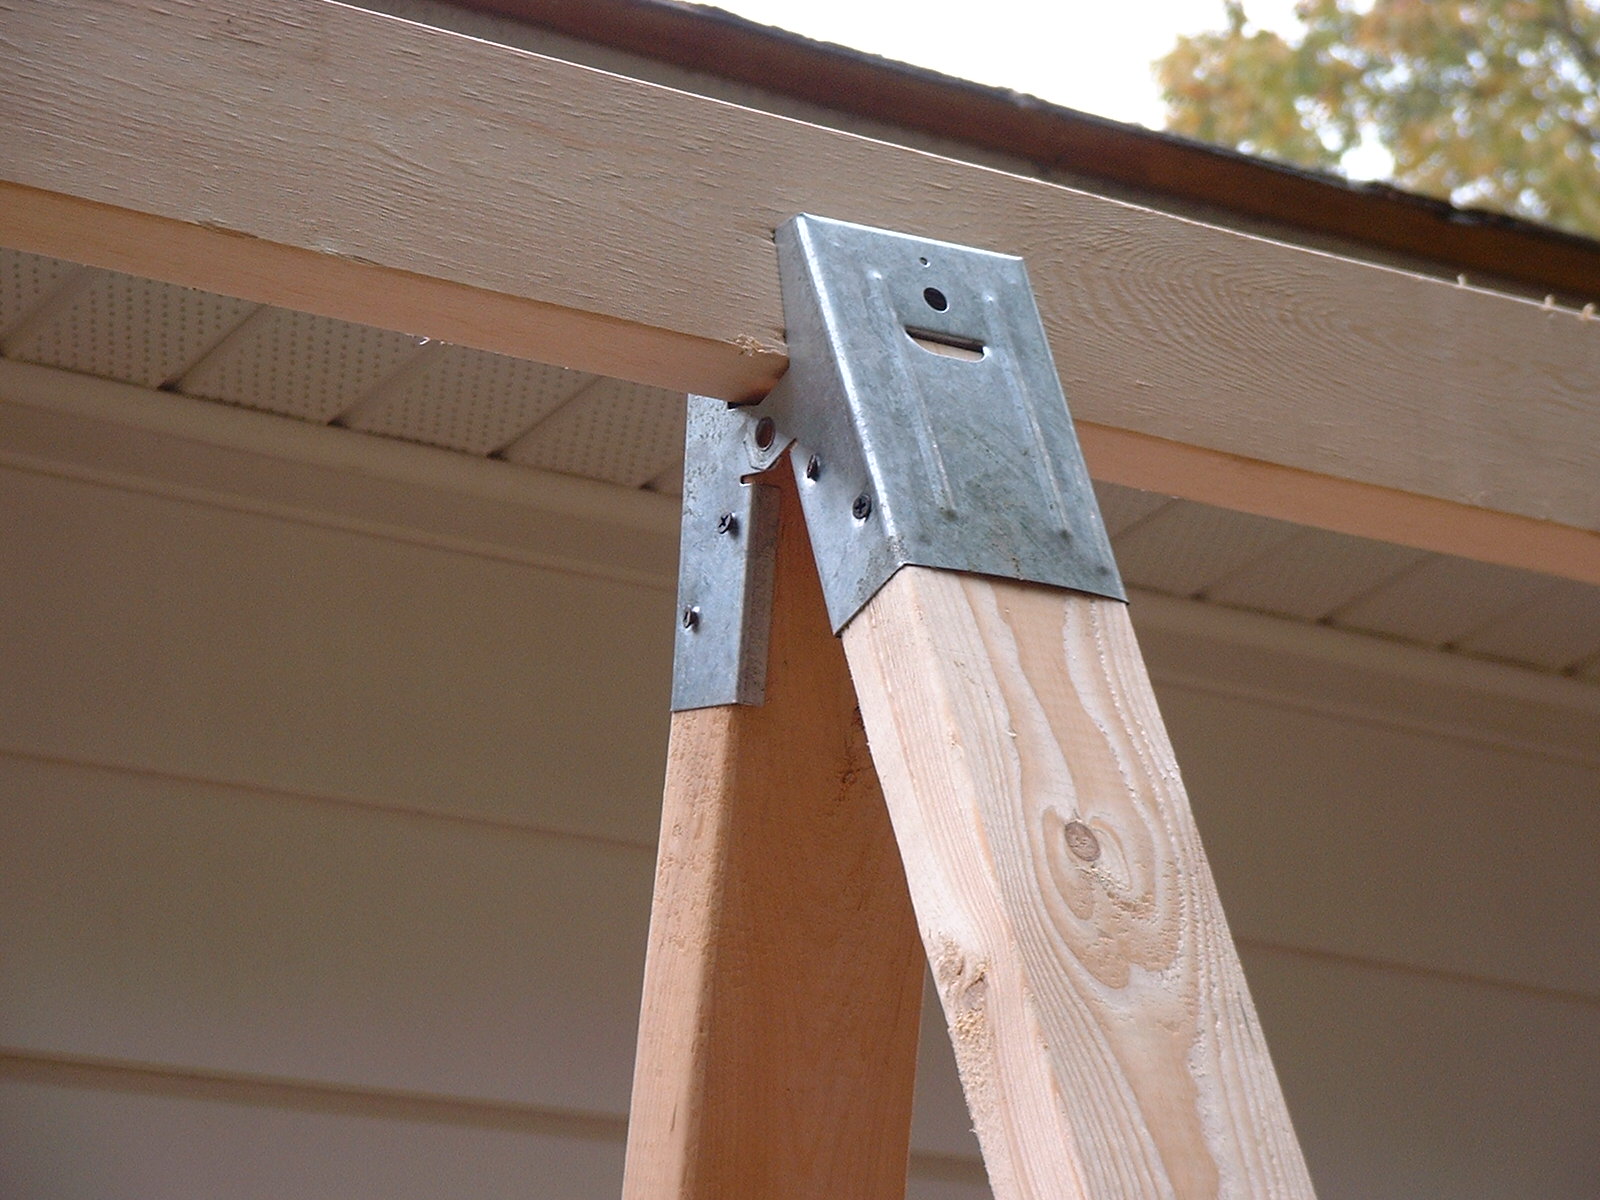
I found that using sawhorse brackets made building the rack easier than screwing plywood brackets on either side of the joint, but they do limit the angle of the rack legs to one position.
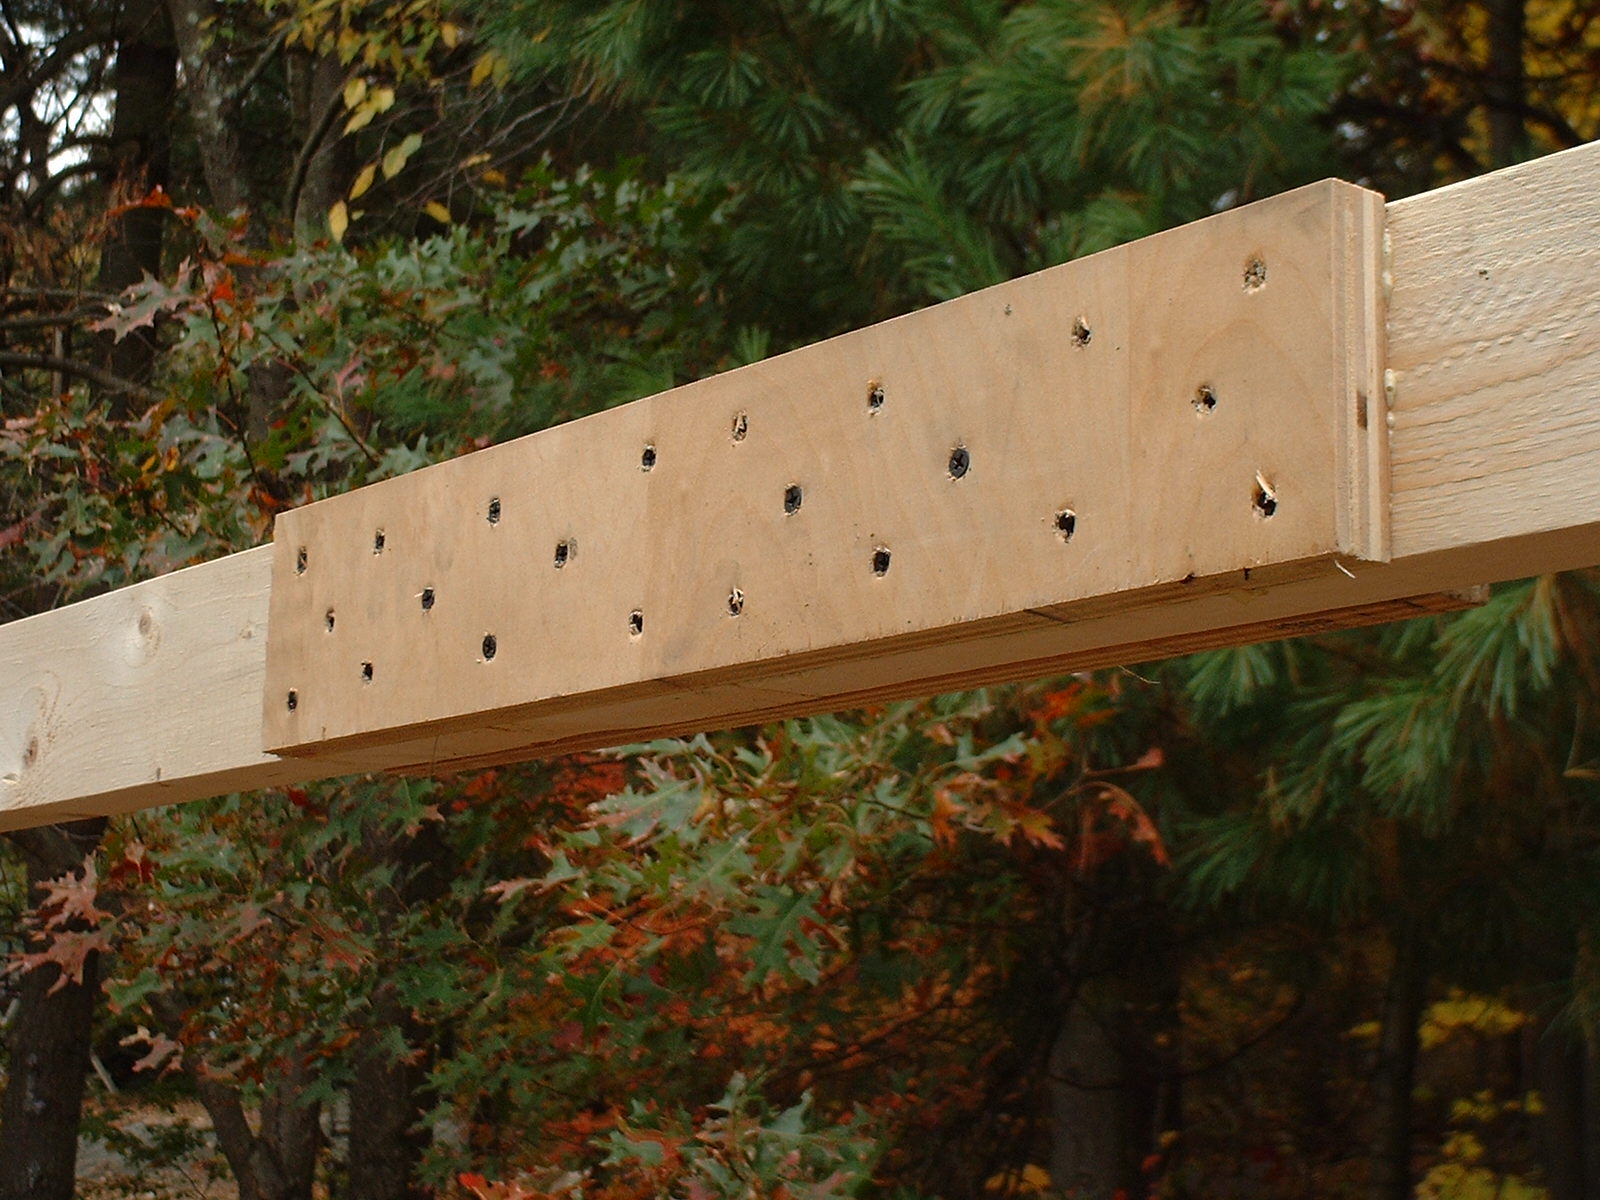
The 20′ top rail is made from two 10′ 2x4s with 3/4″ plywood screwed and glued to the sides to reinforce the joint. The side pieces here are 20″ long, but going longer wouldn’t hurt. If you don’t want to cover the boats, you can use a single 8′ 2×4 and omit the joint.

I put 6″ cobble blocks under the legs to reduce the likelihood of moisture problems over time. They were under a dollar each each at Home Depot. Although it’s not shown here, I ended up drilling through the legs at an angle and driving 24″ rebar stakes though them and into the ground to secure the rack against strong winds.
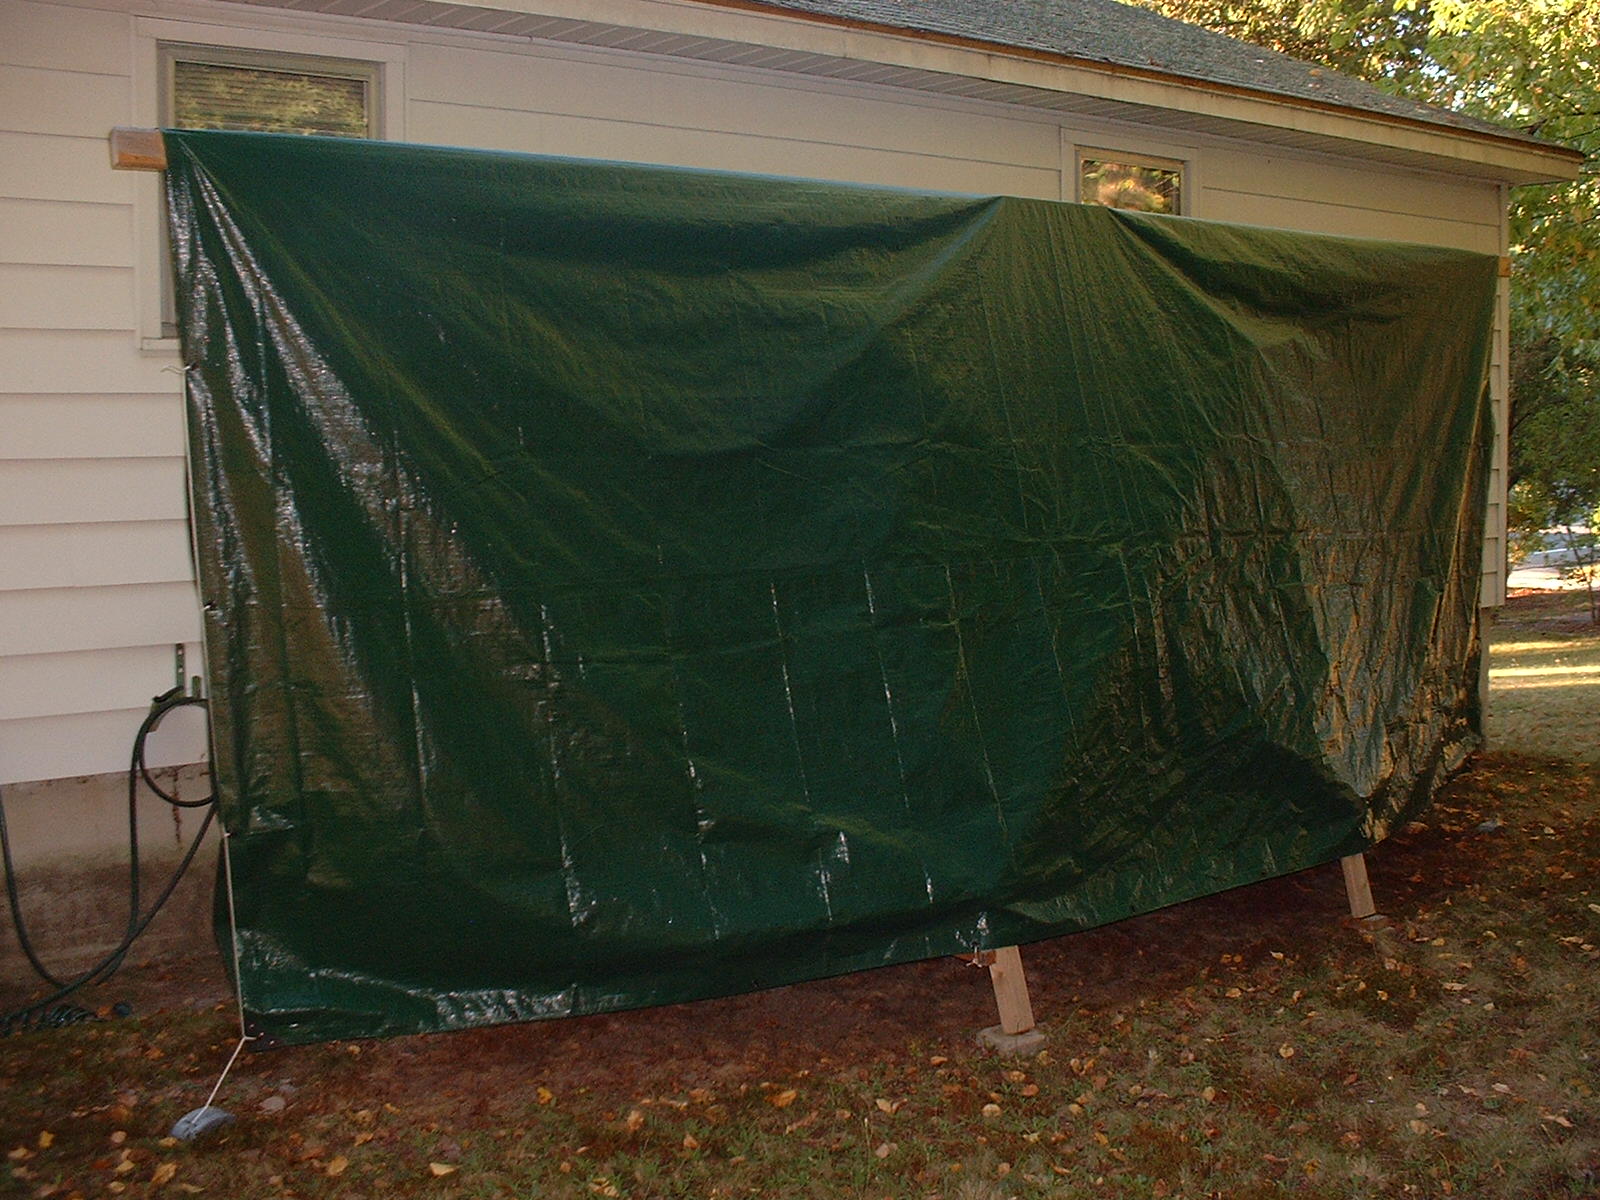
With the tarp cover installed, it looks a bit like a green battleship, but it protects the boats well.
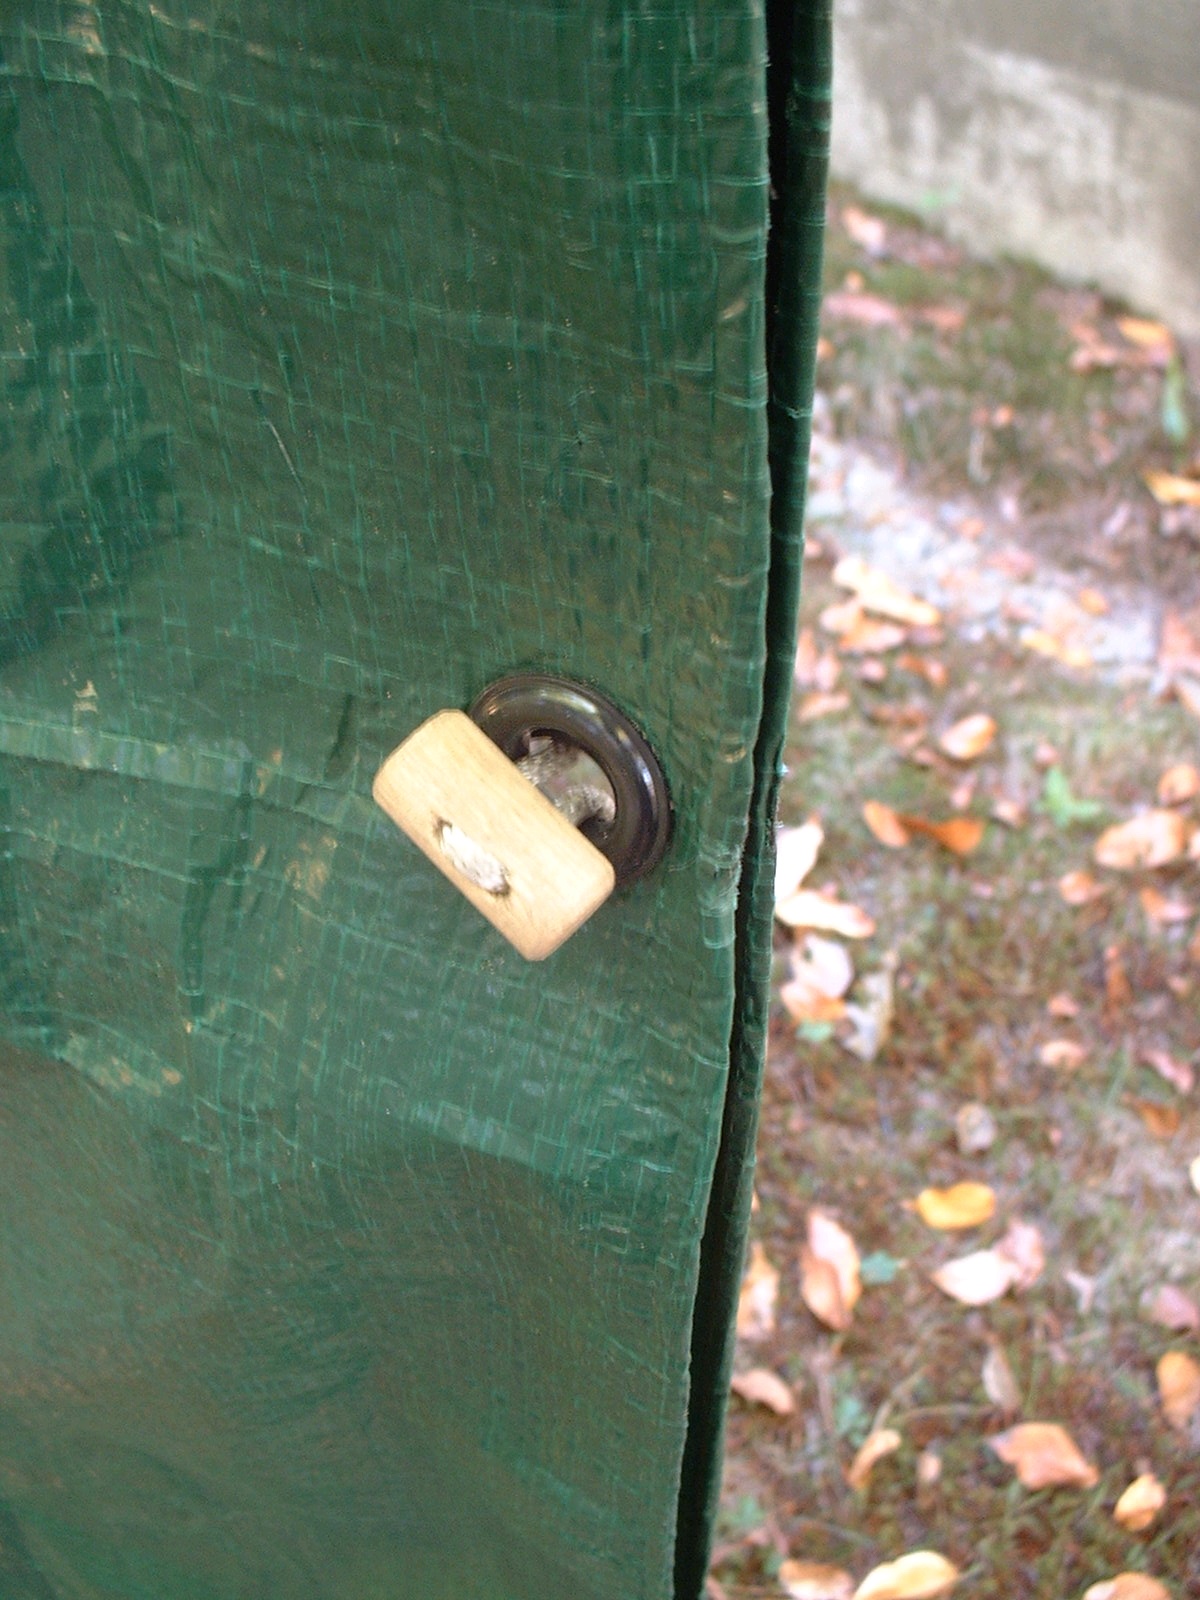
Dowel “buttons” were used to close one end of the cover, to allow access to the boats. The other end is laced shut. Carabiners are also an excellent choice for this.
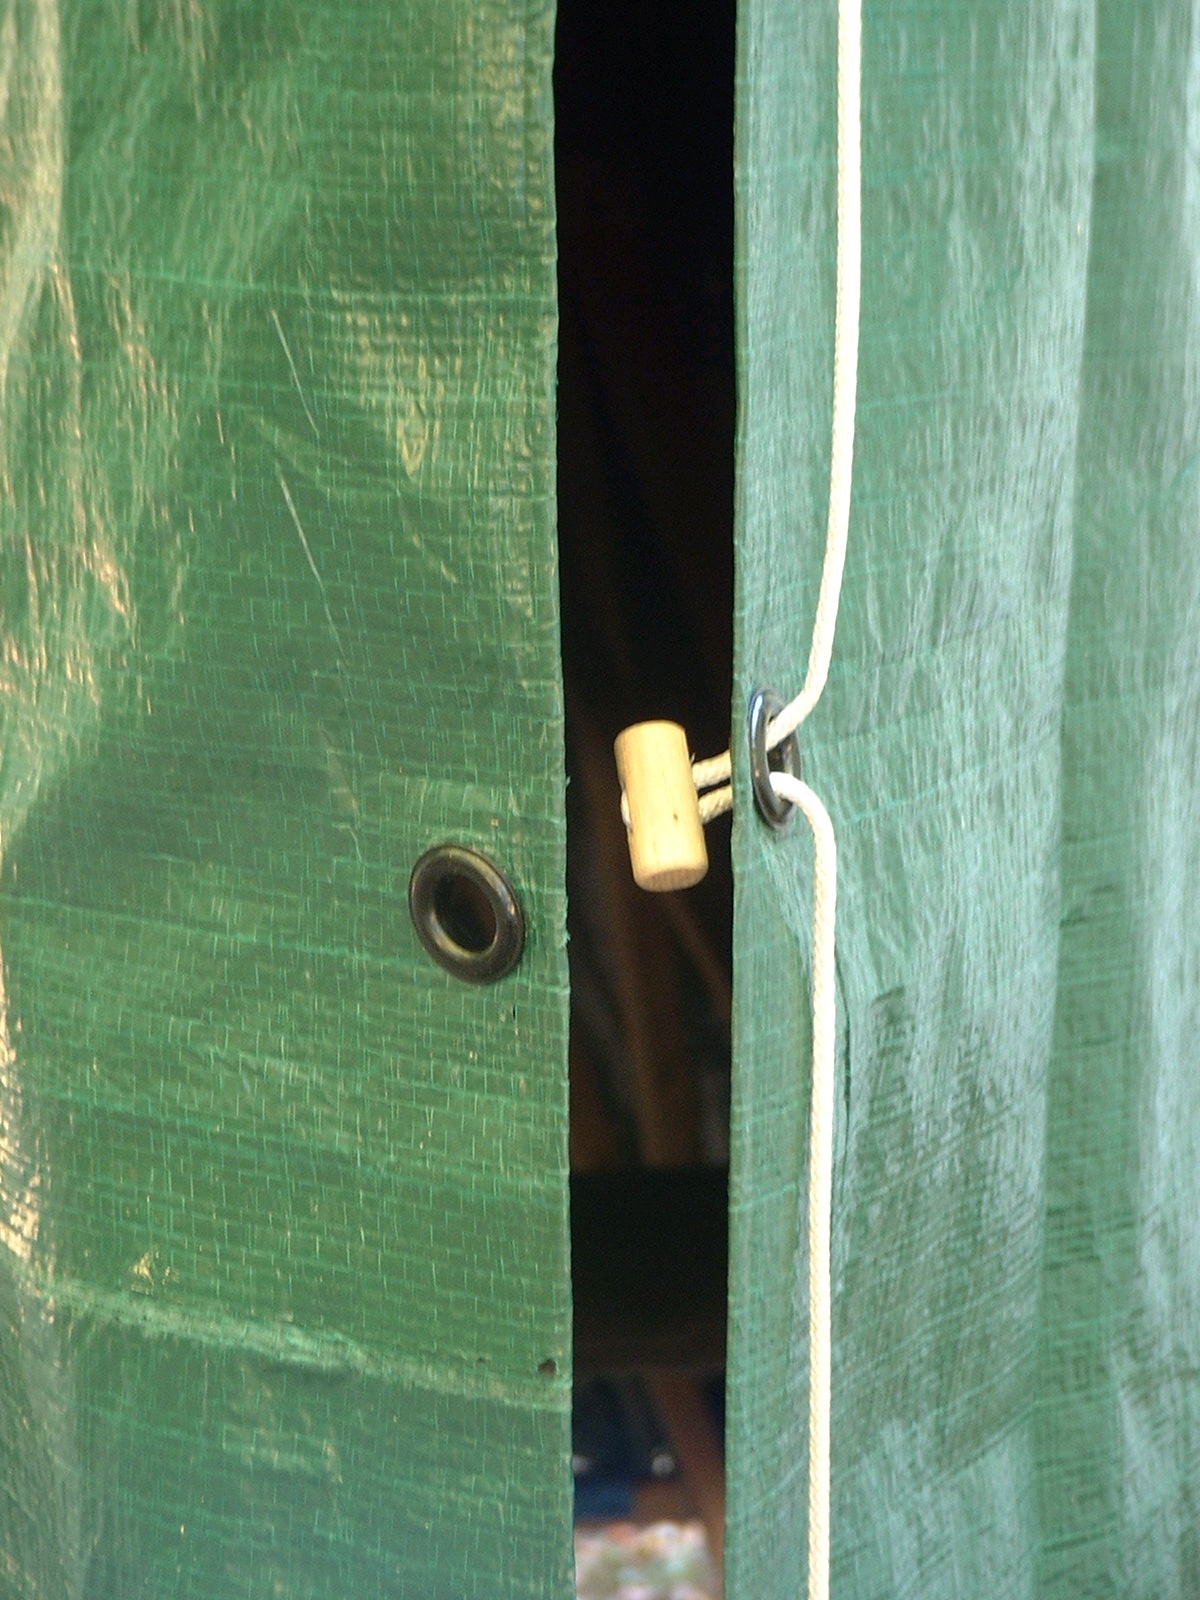
You can see how it’s connected to the cord, which runs continuously from the top button to the weight at the bottom.
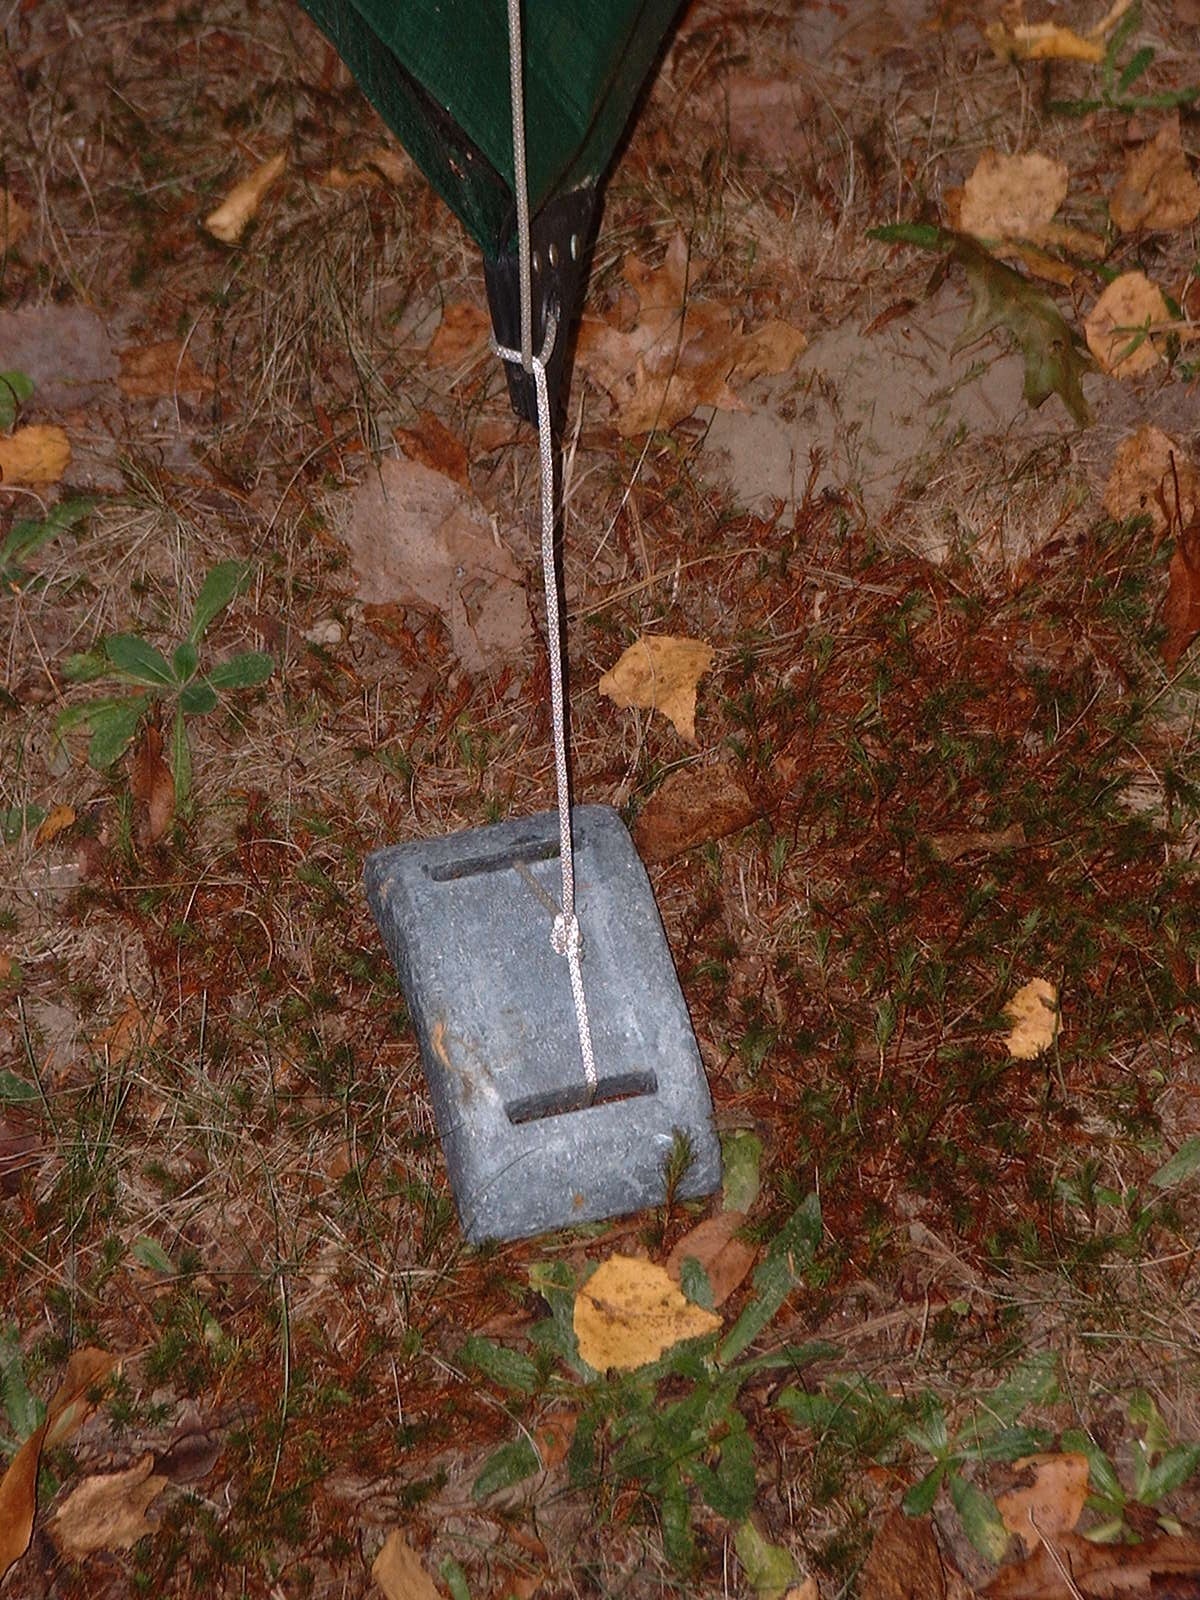
I used a couple of old scuba weights to hold the ends of the tarp down. Other options will work, such as plastic jugs filled with water or sand, or the screw-in ground anchors used for dog runs.